Adding a Model to an Entity
Models
Models are a property on an Entity that represents a reference to a 3d model. This 3d model is renderable inside the globe.
Hive supports two different file types for rendering 3d models, .glb and .gltf. Both
are part of the same specification.
There are samples all over the internet, and you can generate your own 3d models using any popular 3d modeling software.
How to Assign a Model to an Entity
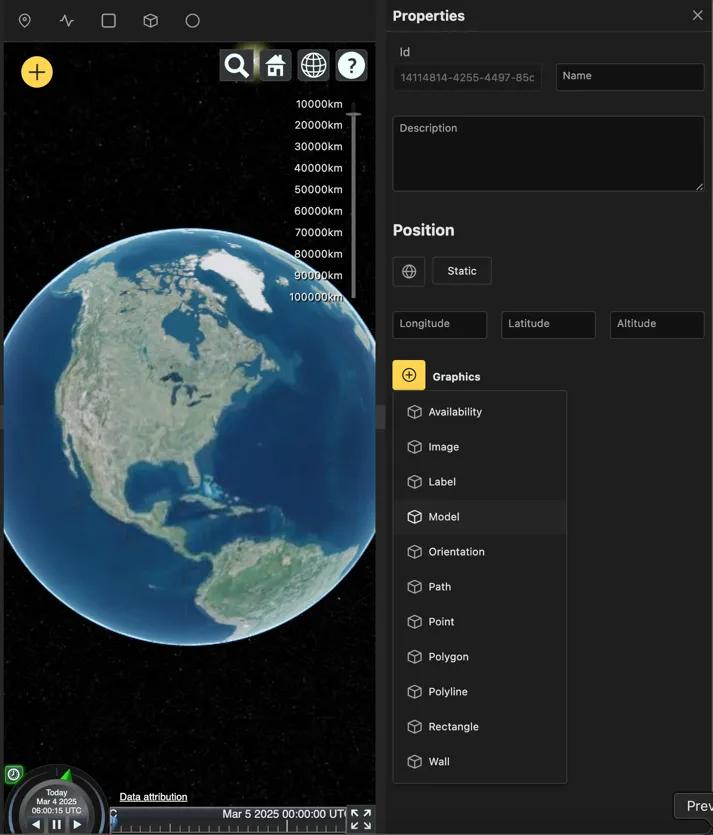
Selecting an Entity will open the Entity properties panel.

Select the Graphics option and choose Model out of the list to add the Model configuration section.
Types of Models
Attaching a 3d model to an entity is currently supported using 3 different methods. This is a short summary of those 3 methods, with more detail available in the sections below.
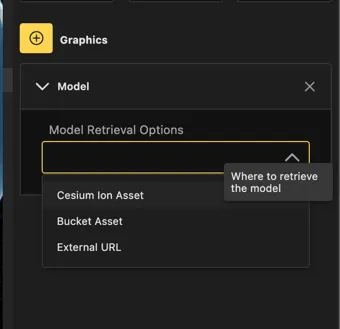
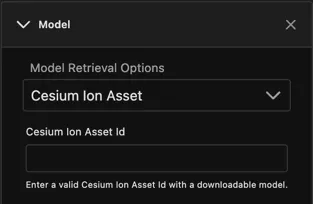
- Cesium Ion: This option (when paired with a valid Cesium Ion subscription) allows for the input of a unique Cesium Ion Asset ID. This asset ID can be found in the cesium ion web application and simply copy-pasted into the Model selection input box. The Cesium Ion method streams a Cesium Ion asset to the page directly from Cesium Ion.
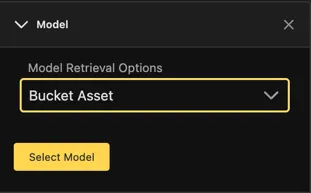
- Bucket: Buckets are a Hive feature that allows for the organization and storage of 3d models based on your subscription level. Storage is limited due to costs incurred by storing and streaming 3d models when editing or or accessing a scene.
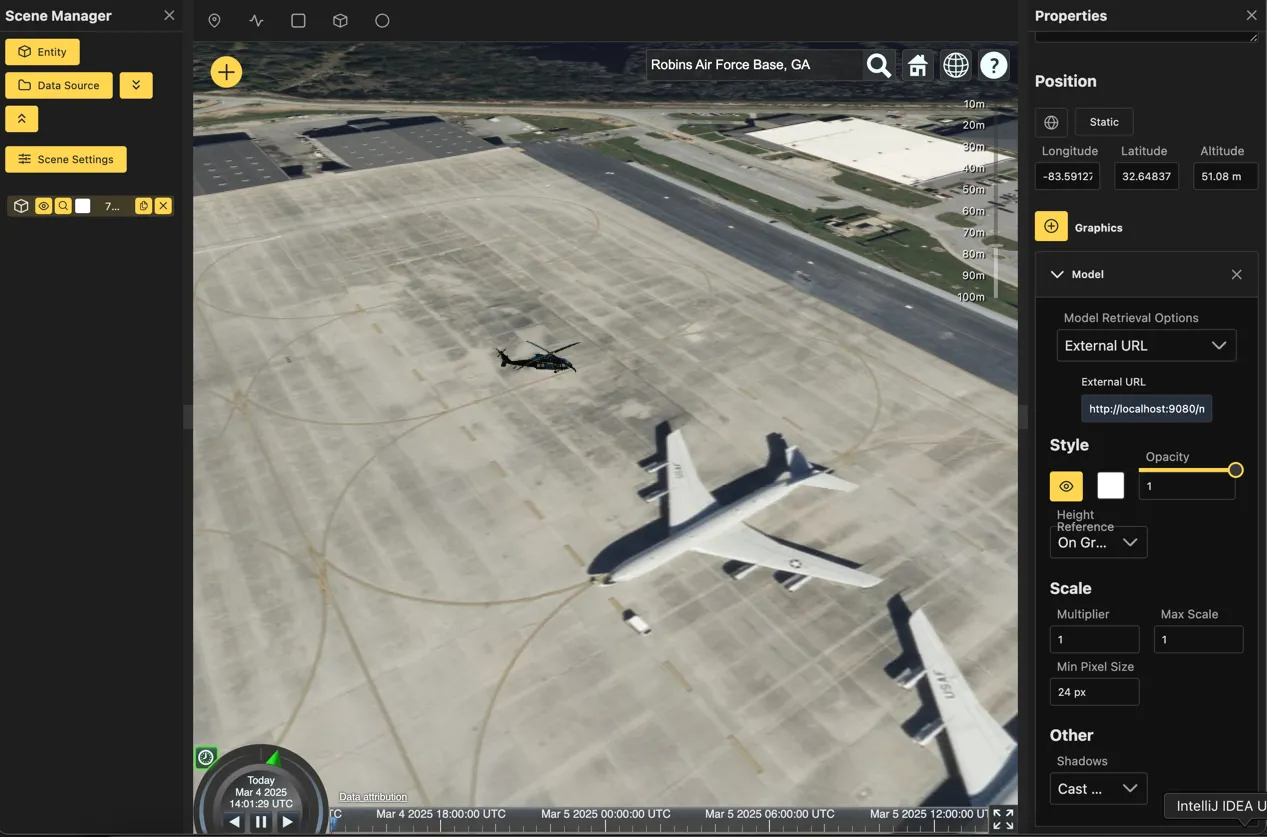
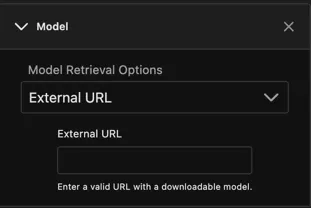
- External URL: The External URL method allows for the simple input of a URL that contains a downloadable 3d model on the end. This is the simplest option, as any publicly available supported 3d model file can be referenced and used within the application.
Cesium Ion
TODO - This ought to show the cesium ion UI and where to find the asset id
Bucket
TODO - This needs to reference a bucket specific guide, and jump back here for the model selection explanation
External URL - examples
TODO external example with images using the sample repository
Model Style Properties
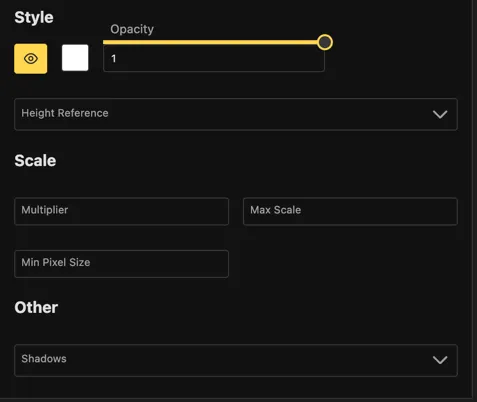
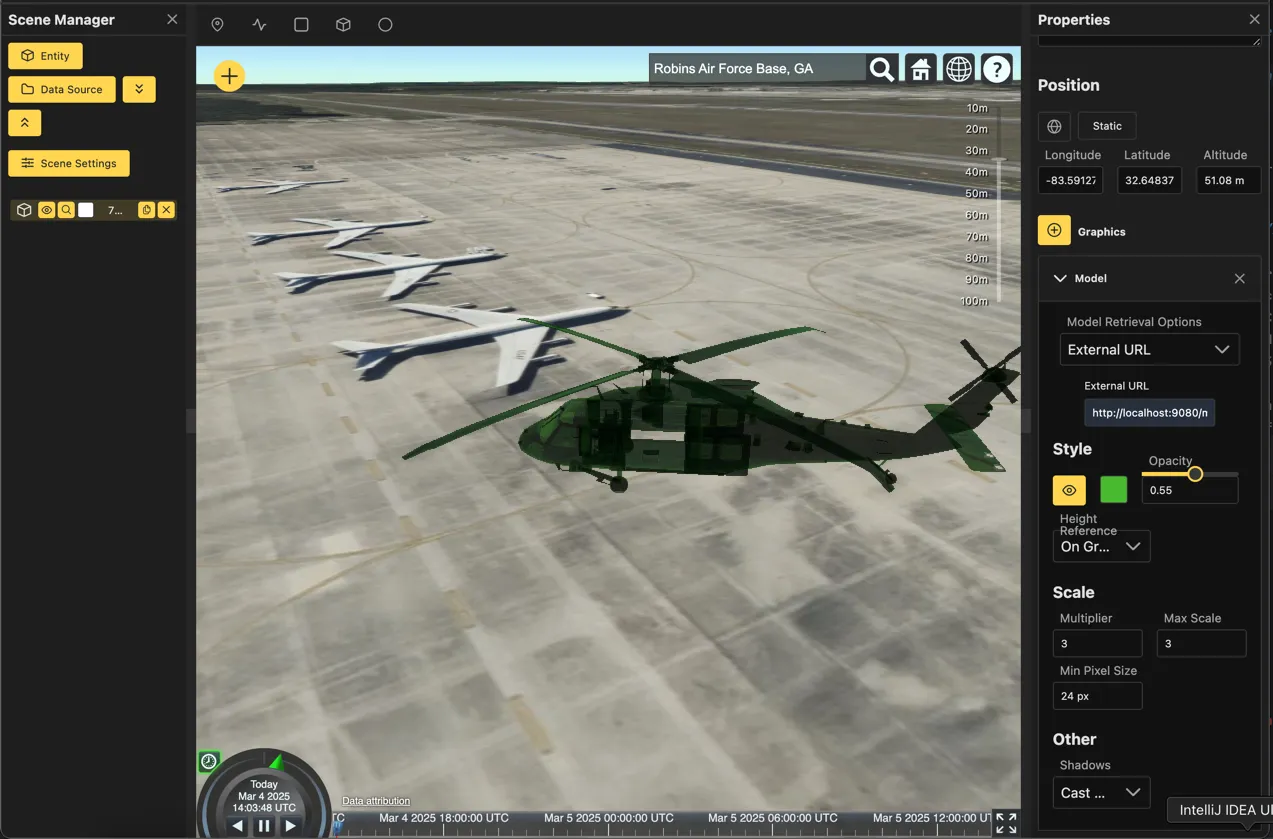
Show/No Show
The yellow eyeball button controls whether or not the model is visible. It can be toggled between
Show, which renders the model on screen, and Hide which makes the model invisible on screen.
Color
Changes the color of the model, models that already have a color are simply altered with the selected color value.
Opacity
The amount of light set to pass through the model, affecting how transparent the model
is within the viewer. An opacity of 1 will result in a solid model, which an opacity
of 0 is entirely transparent.
Scale
How large the model is with relation to it’s original size. For example, a scale of 2 is
twice the original model size.
Multiplier
TODO
Max Scale
TODO
Min Pixel Size
TODO
Other
Shadows
The Shadows dropdown box allows for the configuration of how shadows interact with
the 3d model. It contains the following options:
- Cast Only: Cast shadows on the terrain or other models but not show any shadows on the model
- Receive Only: Show shadows, but not cast any on the terrain or other models
- Cast and Receive: Set the model to both cast and receive shadows from the terrain and other models
- Disable: No shadow interaction or casting with the model from terrain or other models
Further reading
- Dig deeper into Cesium Ion. It integrates natively into our Cesium view!
- To learn more about glb and glTF, check out the wiki page first!